In this guide, our experts here at Optily will teach you everything you need to know about implementing the Facebook Conversions API (CAPI) with your Shopify eCommerce store.
Conventionally, website actions or events taken by a customer are sent using the Facebook Pixel and through a web browser. However, as the digital ecosystem evolves, top browsers like Google, Safari, and Firefox are implementing changes that will obstruct browsers’ ability to share data with ad platforms.
So, the current Facebook Pixel tracking ability is diminished and will only get worse with time. Mastering CAPI is more important than ever because of some recent key developments that have affected the functionality and efficacy of the Facebook Pixel:
- The introduction of iOS 14
- Google limiting the efficacy of third party cookies by 2022
- Increased “signal loss” for Facebook with browsers clearing cookies more frequently
- The growing popularity of Adblockers
- A general increase in awareness and distrust of being tracked
Utilizing the Conversions API can help improve the accuracy of your orders while respecting user consent preferences. Some studies have shown a 20% loss of orders for Shopify due to the above issues, so it can make a huge impact.
Let’s start from the beginning.
What is the Facebook Conversions API?
An API, or Application Programming Interface, is a piece of software that links two applications together, serving as an intermediary and allowing them to talk to each other.
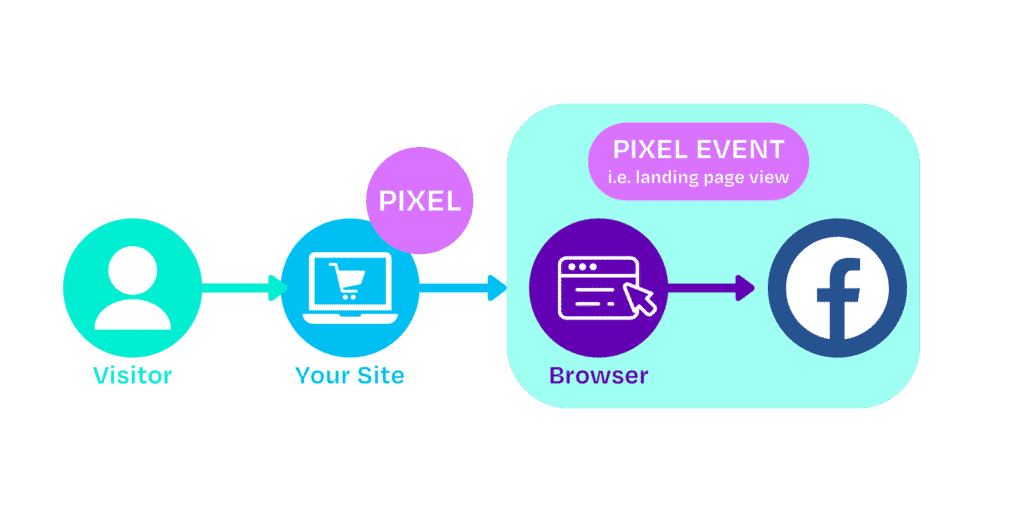
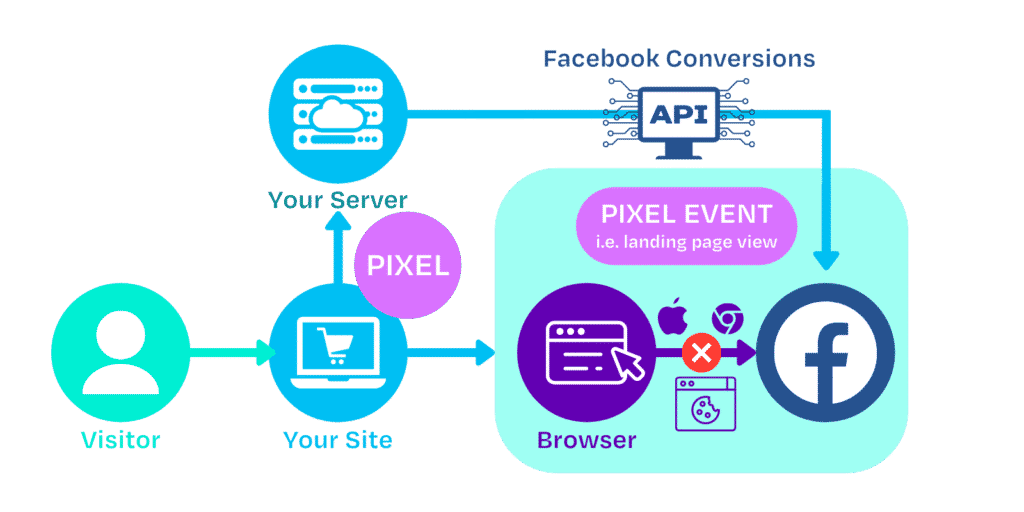
The Facebook Conversions API is a Facebook Business Tool that allows you to share key web and offline events, or customer actions, directly from your business server to Facebook’s. It is distinct in that the information is passed directly from the server-side of the site to Facebook’s servers rather than from a browser.
It’s built on an existing Facebook feature called Server-Side API, or SSAPI, and has replaced it entirely. SSAPI was complex to implement and required serious developer time. CAPI builds on the benefits of SSAPI, while adding new integrations and partner apps to simplify the installation process. The Conversions API works with your existing Facebook Pixel to help improve the performance and measurement of your Facebook ad campaigns.
This server-to-server communication eliminates some of the current challenges where events may not have been properly attributed from your browser due to poor network connections, Adblockers, iOS 14 etc. It works in collaboration with your Facebook pixel to help optimize the performance and measurement of your Facebook Ad campaigns.
Facebook recommends advertisers use CAPI in addition to the Pixel. Some of the benefits of using it include:
- Discrete data control – CAPI allows you to measure customer actions by giving you control over the data you share and when you share. You can now delay until a lead is qualified before sending it back to Facebook so the ads can be optimized more accurately. Or, add product margins discretely or add customer value score.
- Reliable data sharing – More reliable than browser-based methods. Conversions API is designed to be less susceptible to issues like browser crash or connectivity issues. All the PII data are hashed.
- Full funnel visibility – Can use a wider array of data to inform their advertising that is currently captured by pixel like CRM data, lower-funnel events like qualified leads, or multi-site conversion paths. This allows you further visibility into a customer’s full journey.
Collaborating with Facebook Pixel
Facebook’s Pixel, a piece of code that you install on your website, collects various data about your visitors and how they interact on your website. CAPI isn’t meant to replace this, rather fill in the pieces that Pixel misses due to the above-mentioned issues.
Instead of using just one data source, you can implement both, with the Conversions API providing the data that the Pixel is missing.
The Shopify integration can recognize this collaboration and will automatically remove duplicate events to prevent any double-counting when using both data sources together. Using both systems on your account will provide more data to help the algorithm better optimize your ad delivery.
The Role of iOS 14
Unfortunately, the full impact of iOS 14 on Shopify eCommerce stores isn’t fully known yet. This Apple software update, in accordance with their AppTrackingTransparency framework, allows its users more security control. This is largely done by preventing advertisers from being able to track off-platform actions across the web via third-party browser cookies.
While this is a significantly positive step for user privacy, it is a devastating blow for social advertising platforms, as they depend heavily on first- and third-party cookies to be able to attribute purchases made on advertisers’ sites to the ads served on their platforms. Advertisers will be limited to a maximum of 8 conversion events. This is a combination of events from your tracking (like purchases, add to carts), and custom conversions (from URL matching, etc).
How to Implement the Facebook Conversions API on Shopify
In October 2020, Shopify released a new feature, which allows users to integrate Facebook Conversions API with their Shopify store. Here, we will break down the process into simple steps so you can optimize your ads right now in just 4 easy steps!
Step One
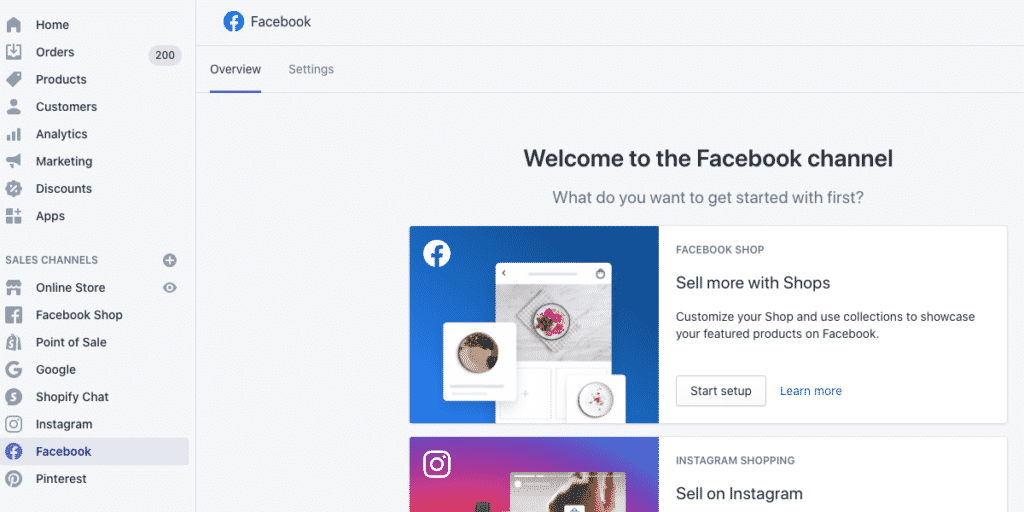
To implement CAPI on Shopify, the first thing you must do is install the Facebook Sales Channel app from the home screen of your Shopify store.
Step Two
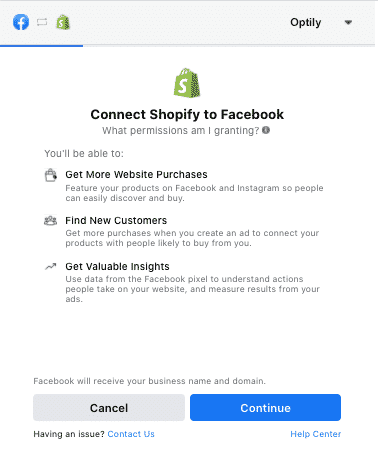
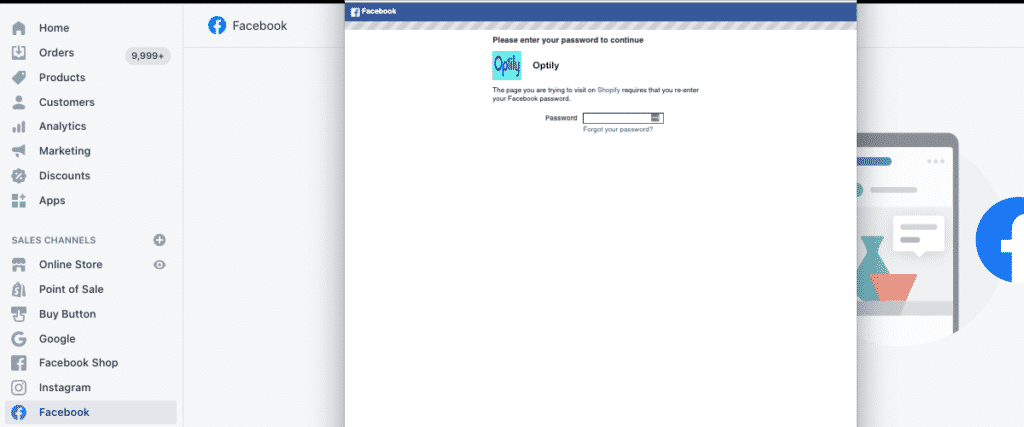
From here, you will need to log into your business’s Facebook Business Manager.
A dialog box may appear where you should select the assets you would like Shopify to connect to; this will depend on your business or client. Another dialog box may appear seeking permission for what operations Shopify will be allowed to control.
Step Three
You can now navigate to the Settings tab. Once in Settings, click on the Data Sharing Settings section.
Ensure that “Enable Tracking” is turned on.
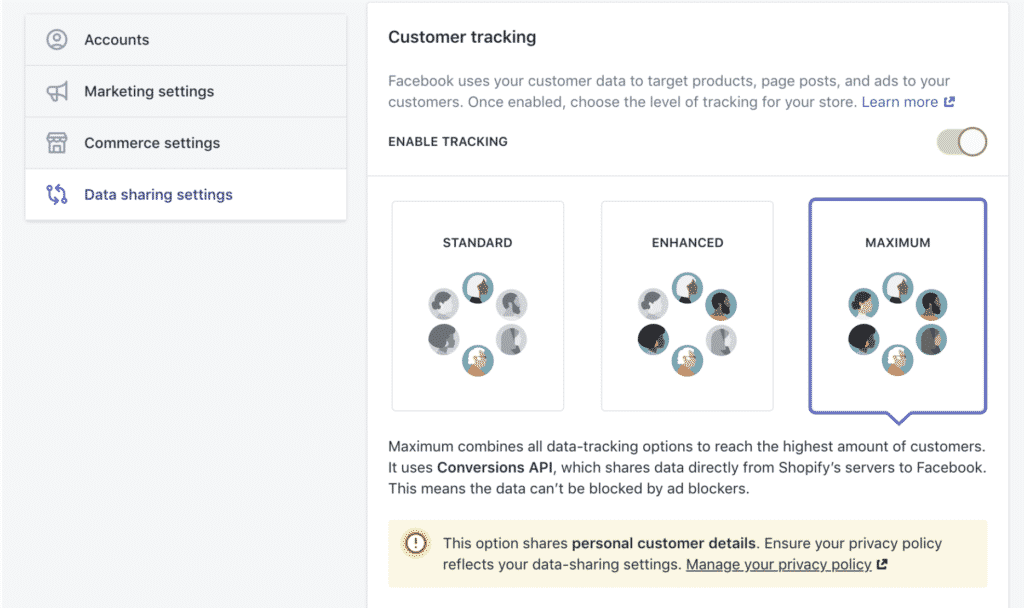
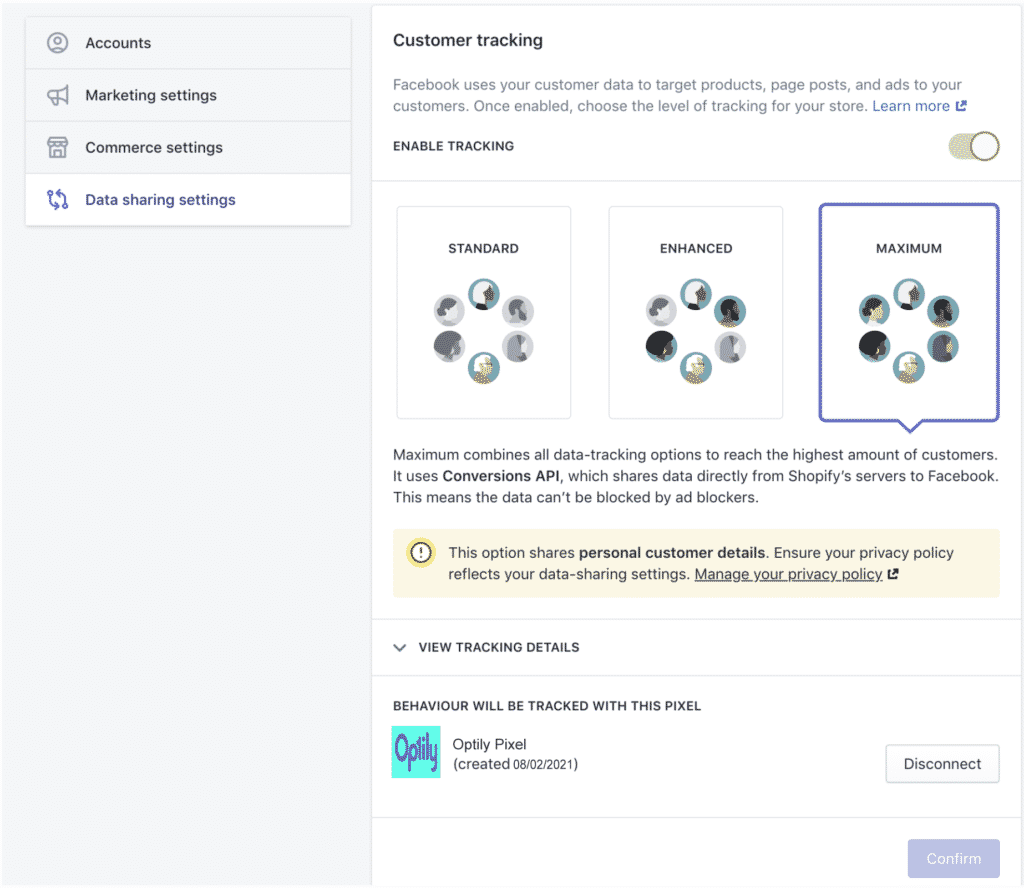
You will see that there are three new options to choose from in Facebook Pixel settings. We recommend choosing “Maximum” as it combines all data-tracking options and is optimized to reach the highest number of users.
Step Four
That’s it, just verify the correct Pixel ID is selected under “View Tracking Details” and you’re finished. You will, however, need to return to the Shopify home screen and click on the Preferences tab (this is where the Universal Pixel ID is placed). Remove it and save.
And as simple as that, four easy steps and you’ve further optimized your Facebook Ads data.
Do you want even better Ad Optimization?
We know this guide made it super easy to improve your Facebook ad data. However, the easiest and smartest way to optimize and improve your ad spend is with the only eCommerce single-click ad spend optimizer, Optily.
Our intelligent and innovative technology connects all your online ad accounts and, with just a single click, helps you make the most of your advertising budget. No more wasting time or money! As you can tell, our team knows a lot about advertising and we’d be more than happy to help you further with any questions you may have.

